Tuesday, 28 December 2021

BOOK REVIEW: THE SPLINTERED EMPIRES.

The Eastern Front 1917-1921


 This is the last of the four book set I bought recently on the Eastern Front during WW1. 

Just like the other books this is a deeply researched and very well written account of the final years of the war in the East , the Russian revolution and the "Pygmy Wars" that broke out after the Armistice as newly independent nations sought their place in the sun.

Following the fall of the Tsar in early 1917, the Provisional Government of Russia tried very hard to continue the war against the Central Powers but as the communist revolution swept through Russia, the army and navy basically collapsed into anarchy. Soldiers Committees sprang up to challenge the authority of officers and discipline in the military fell apart with thousands of soldiers deserting and going home. The Germans offered peace and to backup that offer launched an offensive. With virtually no opposition they advanced throughout the Baltic nations and into Ukraine. Finally, the Bolsheviks, now fully in power and more interested in the revolution than maintaining the fight against Germany, agreed punitive peace terms bringing the war in the East to a conclusion.

With the troops released, but not all as many had to be retained in the East in case the peace faltered, the Germans launched their attack in the West, the result of which is well known. With the subsequent collapse of the Central Powers and the end of the War, the various new nations in the Baltic together with a newly independent Poland all sought to strengthen their positions against Russia and each other in a whole raft of so called "Pygmy Wars". These wars are fascinating in both their variety and scale. The new nations could only field tiny armies and even German troops took part. These various wars offer a huge opportunity for wargaming and this book is worth reading just to understand those scenarios.

Overall a fascinating and very readable book which tells how eastern Europe was reshaped in the aftermath of the First World War.  Together with the previous volumes this is a highly recommended set of books on a fascinating and complex campaign.

Thursday, 23 December 2021

UPDATE.

 Merry Christmas Eve Eve to all.

Just a line to thank all my readers for taking the time to read my blog this past year and I hope to retain your support in 2022. I hope you all have a great Christmas and get the model soldiers, books and other modelling or wargaming things you want from Santa. If you only get shower gel or aftershave, you did not drop enough hints and if you only get socks, you must be on the naughty list !!!!!!

The highlight of my blogging year has to be how  Ion at Archduke Piccolo blog  has taken my Imagi-Nations posts and created an amazing wargame campaign with a raft of superb battle reports. I am proud to have had even a small part in such a well received event.  I wonder if there is another campaign to be had in 2022 !!!!!

I hope 2022 is a prosperous, safe and happy year for you all.

Sunday, 19 December 2021

UPDATE.

Despite the demands caused by the rapid approach of Christmas I have managed a good amount of modelling time these past couple of weeks. In fact I have completed all the upgrades I have been working on for the last couple of years. My three armies are now complete with each having a strength of 20,020 which together with an Army Group Command battalion gives me 60,302 soldiers with the colours.

I have now started construction of my new fourth army.


This photo shows the screws counted out for the first of the 24 new infantry battalions for that army. These battalions are 407 strong including the two flag bearers which can be seen to the left above. Uniform painting will commence shortly. I have also made a start on vehicle construction.


This photo shows a batch of 16 GS wagons and 18 light GS trailers. The vehicle bodies have been made and shafts fitted. The next steps will be fitting wheels and horse mounting blocks to the wagons before moving onto painting.

Regular readers will be aware that Ion of the Archduke Piccolo blog has been fighting a wargames campaign based on my Imagi-Nations articles. The campaign is now reaching its climax and I encourage all to read Ion's exciting battle reports. The latest is due for publication any moment now and will undoubtedly be well worth a look. Once the campaign is complete I will publish the next installment of Imagi-Nations which will give an overview of this campaign and the "historical" implications.


Tuesday, 14 December 2021

CONSTRUCTION OF HORSES.

The original Miniature Warfare magazine article on which my armies are based included flat horses made of card. I have used that principle for my horses but use 30 thou plastic card instead as it is considerably more durable. The idea of flat horses however in my view is perfectly acceptable. They are after all only a representation of horses in the same way that screws represent soldiers. 

As to the construction of the horses, I cut the plastic card with a modelling knife into strips using my "master" horse as a guide, then measure the length of each horse at 20mm, then cut the resultant rectangles with scissors. I then cut the horse shape freehand again with scissors. After the thousands I have made I know exactly where to cut which is around one third in and one third down give or take a bit  !!!!!!!!


The photo above shows the strip with a rectangle below and the final horse shape at the bottom. I usually cut up a whole sheet of plastic card at one time so as to have a number of horses in stock. It can be tedious to make horses for each batch of vehicles so I find it best  to have a stockpile. I will detail the painting methods I use for horses later under the  Painting Techniques heading.

Friday, 10 December 2021

BOOK REVIEW: RUSSIA'S LAST GASP.


This is the third in the series of books I recently purchased on the Eastern Front during the First World War and covers the events of 1916.

Probably the most significant military event was the Brusilov offensive. He was the only Russian general who actually studied the tactics and outcomes of the war to date and had learned much from the German offensive in 1915. Consequently he re-trained his forces and created an artillery bombardment plan.  As a result he was able to launch a highly effective assault which only came to a standstill as a result of logistical issues and the increasing presence of German reinforcements rushed from the West. However he had dealt a death blow to the already weak kuk which for the rest of the war was little more than a militia force wholly dependant on the German army.

Later in the year Romania finally decided to join the war on the side of the Allies. However they had waited a touch too long and Germany was able to transfer troops from the Brusilov front and not only stopped the Romanian offensive into Transylvania but, together with their Bulgarian allies, launched a counteroffensive which resulted in the capture of the Romanian capital Bucharest. A couple of very interesting learning points here is that the Bulgarians and  Romanians still used oxen for much of their supply service and even for some artillery units and that several Turkish divisions also took part in the invasion of Romania.

Once again the increasingly difficult food situation in Germany and Austria-Hungary is discussed together with the efforts in Germany to increase war material production. The political situation in Russia is also discussed at great length and it is noted that by the end of the year significant cracks were appearing in Russian society. The seeds of revolution had been planted and were growing at a fast pace.

Once again this really is an excellent book on the Eastern front and highly recommended .


Monday, 6 December 2021

GLUE.

My "go to" glue is UHU Hart.                                                                                                                      


This is an excellent glue especially made for balsa which is the basic material of all my vehicles but it is also good for sticking metal to wood provided it is used generously. I have only found one model shop that sells this glue, fortunately for me it isn't too far away but I still buy several tubes at a time. However it is readily available on the interweb. 

 The one thing it will not stick is plastic to wood. Therefore I use super glue where there is plastic which is basically only on artillery guns. That said I still roughen the plastic surfaces to ensure a good bond. I am allergic to super glue so I have to wear a mask and ensure the room is well ventilated. That means window wide open , not a big deal unless it's winter in which case I freeze !!!!! I also use an activator with the super glue, it's just so much faster. In fact if I was not allergic to it I would use superglue for everything.

 The other glues I use are plastic model glue when building cavalry but I will explain that later in an article on cavalry construction and hot melt glue which I use in the construction of GS wagons but again I will cover that in a future article on wagon construction.

Friday, 3 December 2021

UPDATE.

 With the onset of winter, as usual I find myself with a little more modelling time. I have now completed number 46 of my upgrade programme which gives 59,660 soldiers with the colours and only 618 left to finish, all of which are already at various stages of the painting process. This includes upgrade number 50, a small upgrade I recently identified which provides an additional GS wagon with drivers for each of my heavy artillery battalions.

For some time now I have been acquiring fresh stocks of materials in preparation for the building of my new 4th army. This includes paints, drawing pins (wheels), plastic card (horses), twisted wire (harness), decals  (flags), shelf support studs (field artillery), balsa wood (wagon bodies) and dowel rod (water trailers). Almost all of these items have been purchased by family members and will become my Christmas presents from them. I have reached that time of life where there really is very little else I want or need except more socks and who wants socks for Christmas !!!!

The new display unit I recently built has an extra row of shelves compared to the existing three units. This was done to enable the creation of a few extra battalions for the existing armies. Following my decision last year to provide each infantry battalion with a heavy weapons company I dismantled most of my dedication heavy weapons battalions leaving just one in each army, as army troops. I have now decided that each army should have two of these battalions.

Together with those I now have 75 battalions and regiments  to build for the new army. This is a total of just under 22,000 soldiers and about 2,400 vehicles and equipments. That includes some 490 GS wagons, 108 ammunition wagons, 275 utility trailers (field kitchens, water trailers etc), 228 guns of various types, 284 limbers, 447 light trailers (caissons, GS, signals etc), 156 other wagons (ambulances, forge wagons etc) and 390 heavy trailers (HQ, Medical, workshop etc). 

In order to keep track of what to build and to provide myself with a varied programme of different things to make, I have created a production list of 76 batches. Each batch is of a single type of vehicle, for example 30 GS wagons, 28 limbers or 24 forge wagons etc. I usually prepare all the components first then carry out assembly in stages over a number of days before painting the finished vehicles. I find that process works better for me than just making the equipment for a single battalion at a time. At the same time I also paint a battalion of soldiers which gives me plenty of variety on the workbench at all times.  Being a bit of a list freak, you will not be surprised to know that I also have detailed painting lists for the soldiers of each type of battalion too !!!!

I estimate it will take me at least five years to build the new army. No doubt during that period I will  identify any number of revisions to make to the armies, the current authorised strength of which is now a little over 82,000. There are always tweaks and changes to make which usually involve hours of fresh work. For example adding just one new soldier to each battalion would require the painting of over 280 new screw soldiers and it has taken me over two years to complete the current set of upgrades !!!! So overall this should keep me going until I reach that point in time where brain fog and overall debilitation means not getting up till lunchtime and then spending the rest of the day watching tv !!!! well actually ......


Monday, 29 November 2021

BOOK REVIEW : GERMANY ASCENDANT.

 THE EASTERN FRONT 1915.


This is the second in the series of four books I recently purchased covering the war on the Eastern Front 1914-1921. Once again a well written and exhaustively researched book with huge detail.

1915 started with terrible battles in the Carpathian mountains which more or less completed the destruction of the kuk (Austrian-Hungarian army) which had started in 1914. Neither side made any progress other than to increase the already vast casualty lists. During the summer the Germans launched an offensive, partially to stop the total collapse of the kuk but also to push the Russians back thereby reducing the pressure on the Eastern front so they could concentrate on the West. The offensive was very successful and resulted in the capture of most of Poland.

Later in the year the Germans and kuk launched an invasion of Serbia which resulted in the occupation of that country and the escape of the Serbian army to Corfu. The year ended with Germany returning troops to the West, the Russians and kuk exhausted and suffering from almost 2 million casualties each.

Generally speaking we all know of the dreadful losses on the Western front but these books show that the casualties in the East were at least as great if not larger. The conditions were brutal given the weather and terrain especially in the mountains. Although the Germans mounted a very successful campaign, advancing many miles over the summer, it was still necessary for them to halt every 70 or so miles in order to bring up further supplies. Each stop gave the Russians time to build more defenses which then had to be overcome. 

As well as covering the fighting this book also goes into great detail about the politics, economics and strategies of the various nations which really adds to the overall value of this excellent and highly recommend series of books.


Tuesday, 23 November 2021

UPDATE.

 I have managed a reasonable amount of modelling time the past couple of weeks and have now completed upgrade 45 of 49. In fact number 46 is three parts done too. With so little left to do to bring the armies up to full strength I will soon be constructing the "production lists" for the new fourth army. I will share some figures from those lists when they are finished.

On another matter, my armies use what I call "house bodied" wagons and heavy trailers in a variety of configurations. These include office, medical, signals and workshop  vehicles. I have always "imagined" some of these vehicles to be fitted with tent like awnings that can be "unrolled" so as to provide additional weatherproof working space. Over the years I have experimented with a number of structures to try to represent these awnings but nothing has been satisfactory....till now !!!!

When looking in my workshop drawers for some wall plugs recently, I came across some  old plastic "rawlplug" strips. These are about 12 inches long (300mm) and can be cut to length for use with extra long screws. They come in different colour coded thicknesses. After a bit of thought I cut up a strip, filled the central screw pilot hole with filler and fitted the pieces to a couple of wagons. The result is below.


I used the "red" thickness. These strips are not often seen in shops nowadays but are readily available online and are not expensive. I hope the picture is clear enough to see the painted strips on the wagon roof. I think this is the best way of representing rolled up awnings that I have found yet. However, before undertaking the task of retro fitting a few hundred wagons, I would appreciate readers views on this idea, does it look right ????

As some of you will know Archduke Piccolo has been wargaming a campaign based on my Imagi-Nations series. The battle reports are really good and the next installment is due shortly. I encourage all to visit his blog.


Wednesday, 17 November 2021

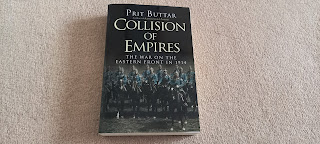
BOOK REVIEW: COLLISION OF EMPIRES.

THE WAR ON THE EASTERN FRONT IN 1914.


 Sometime ago I reviewed a book from my library about the Eastern Front during WW1.  As a result I decided I needed to learn more about these fascinating campaigns. After some research I found a series of four books written  by Prit Buttar, who is a distinguished British based historian of the Eastern Front in both wars. This is the first of that set of books and covers the fighting in 1914.

The book is very well written and seriously well researched. Although it focuses on the actual battles it also covers the leading personalities and the political and economic situations in the three main protagonists, Germany, Russia and Austria-Hungary. The see-saw nature of the fighting, the dreadful loss of life and the terrible ground conditions are also discussed in depth.

It is clear that the fighting of 1914 broke the back of the kuk ( Austria-Hungary) army. A rather fragile force to start with, it never quite recovered from the huge casualties it sustained in those first few months. In fact I had not realised just how heavy the casualty lists were. We are all clear as to the size of the loss on the Western Front but in fact those on the Eastern Front were equally large and in fact, the number of prisoners, on all sides,  was much greater than in the West.

Although there was significant trench fighting it was on a much lower level than in the West. The distances involved meant there was always a flank that could be turned. Logistic issues also played a major role particularly in the offense where it proved impossible for an advance to go further than about 70 miles beyond railhead without a substantial pause for the railhead to move forward. In fact the Eastern campaign was always a war of maneuver similar to the first few months of 1914 in the West.

Overall an excellent book about a comparatively unknown campaign and highly recommended if you want to know about the Eastern Front in WW1.

Friday, 12 November 2021

UPDATE.

 With the advent of winter fast approaching I am getting a bit more time for modelling. In that respect I have now completed 43 upgrades out of the total of 49. The strength of the armies has now reached 59,040 with a target of 60,278.

Within the upgrades there has been only one that required more vehicles and equipment. This was the addition of an extra company to the three Heavy Weapons battalions. Each new company required two limbers, caissons and heavy machine guns and an ammunition wagon. These vehicles have been constructed as seen below. In addition, while issuing mounted corporals to the Field Police battalions a week or so ago, I found that one battalion was short of a GS wagon. I have no idea how that happened but a new wagon was constructed at the same time and can be seen on the top right of the photo.

It has occured to me that some of my readers may never have seen all my very old posts. As some of these, in my humble opinion, are interesting, it occurred to me to update and re-publish some of those posts. The first one was on Artillery Observation Wagons which I posted a few days ago. Over the coming weeks and months I will also be re-publishing and updating those posts relating to the organisational structure of my armies. Many changes have taken place since the original posts were drafted so I get to kill two birds with one stone.

Finally I feel I must share an interesting experience. Apart from starting this blog to share my armies with others, I have long wondered about exhibiting my soldiers at a wargame show. I sought advice on this idea and it was suggested to me that instead I should offer an article to one of the mainstream wargame magazines. Thinking this a good idea I sent a draft, with photos, to Miniature Wargames magazine.

The response included the words " pretty bonkers".  So maybe not such a good idea after all then !!!!   

I think  I will just stick to the blog from now on !!!!


Monday, 8 November 2021

BOOK REVIEW: SURGEON WITH THE KAISER'S ARMY.


This is a super book. I found it while trawling on Amazon for new publications. It is edited by the authors grandson having been originally written in the early 1960's.

The author was a medical student when he was drafted into the German army early in 1914. As a fully trained soldier by the outbreak of war he served on the Western Front before his regiment was transferred to the Russian front. Soon after going into battle during the German offensive in November 1914 he was wounded. By that time he had been selected for officer training. During his convalescence it was noted that he had been a medical student so he was commissioned as a Lieutenant in the Medical corp.

Despite not having completed his medical training he served the rest of the war as an army doctor on the Western Front. His experiences over the next few years are a fascinating, extraordinary and very illuminating record of Germany at war. Throughout the book he discusses the war from the German perspective and provides a very different view of the war, its origins and its progress from that we may be used to reading.

After the war he returned to university to complete his medical training and became a highly qualified and successful  doctor. However as a Jew he found the rise of the Nazi's intolerable and became an outspoken critic of Hitler. He left Germany and came to England  in 1933 following a tip off that the Gestapo were on their way to arrest him.

He continued his career as a Harley Street surgeon and served in the British army during the Second World War running a military hospital with the rank of Colonel.

This is without doubt one of the best books I have read for a long time. It is very well written and describes not only a fascinating war record but also gives a refreshing general view of the war from a German perspective. Highly recommended.

Wednesday, 3 November 2021

ARTILLERY OBSERVATION WAGON.

Sometime ago I was reading a book where a German artillery officer of early 1914 described using the "observation wagon " to locate British troops. I know the practice of British artillery officers was to use an up turned limber to see further but had not seen reference to a specialised  observation wagon. Such a vehicle sounded very suitable for my army. 

After some research I  found photos of such a vehicle in German service in WW2 but the photo showed the vehicle in the travelling mode. After more digging I at last found a photo of a vehicle from WW1 actually in use showing clearly a telescopic ladder mounted on top of a box like two wheeled trailer. 


I decided to provide my artillery battalions with this equipment. As a basis my standard box trailer was clearly  perfect.  I also use this vehicle as a base for field kitchens, signals and medical trailers and ammunition caissons. Each is distinguished by means of an addition such as a smoke stack, aerial , red cross or spare wheel. The obvious requirement for an observation wagon would be a ladder mounted horizontally in a travelling position. Next question, where to source ladders ?? especially over 40, that being the number of artillery battalions I have in service. I knew I could get ladders from a model railway shop but at what cost ??

I concluded I needed some sort of mesh which could be cut up into suitable scale ladders. Nothing obvious came to mind so I just started looking. A few days later during a visit to Poundland I spotted a pack of two fly swotters for a pound. This looked like my raw material. On getting home I attacked the swots with my modelling knife and soon enough had produced some 118 perfect ladders. After attaching  to a wagon body and painting this is the result.


Since then I have built many of these vehicles which now equip all 42 of my field and horse artillery battalions and regiments.

Saturday, 30 October 2021

UPDATE.

 The past couple of weeks have been very exciting for me because Ion Dowman of the Archduke Piccolo blog decided to wargame a scenario from my Imagi-Nations series. After considerable correspondence we agreed an approach and he has now fought two battles from the campaign outlined in Part 44 of my posts. The battle reports are on Ion's blog and readers are recommended to have a look at these exciting and well written reports. 

Apart from narrating the history of the Union in my articles, I have consistently tried to provide wargaming scenarios ranging from Cavalry actions to infantry skirmishes as well as major battles and campaigns. To see someone actually using these scenarios is very pleasing to me.

Apart from the fun of seeing my ideas actually played out I have received some additional visitors to my blog. So welcome to my new followers, I sincerely hope you continue to enjoy my efforts. In that regard this post is the 300th since I started the blog in June 2018.

On the modelling front I have at last completed the final mounted upgrade.

This upgrade provided corporals for Horse Artillery Regiments and the mounted squadrons of the Field Police battalions. I now have a total of 2,226 mounted soldiers. Of course most are in the 18 Cavalry Regiments but Horse Artillery Regiments and Field Police battalions account for 264 of the total.

 As a reminder of what one of my Cavalry Regiments looks like, below is a photo of the 9th. Based on my Imagi-Nations articles this is from a scene during the fighting in Ukraine when Union Cavalry were raiding the Russian lines of communications. To protect the railways, the Russians had built a series of blockhouses. In this particular case Union Horse Artillery have taken a block house under fire and 9th Cavalry stands ready to ride down any escaping Russians. Once the Russian position has been destroyed, the Union Cavalry Brigade can ride on to attack the railway.

If anyone else wishes to utilise my Imagi-Nations articles for a wargame please let me know, I will do all I can to assist.


Wednesday, 27 October 2021

BOOK REVIEW: WILLIAM PITT THE YOUNGER.


My mother in law was giving this book to a charity shop before my wife spotted it in a box and thought I might be interested which of course I was.

William Pitt the elder was quite an influential person in his day but his son was even more so. He dominated Parliament for most of his adult life after becoming Prime Minister at only 24, a feat never likely to be repeated.  Clearly a highly intelligent workaholic and indeed almost certainly an alcoholic 
too, this man literally worked himself to death at the age of 47.

He led the nation through some of the most turbulent times as the Industrial Revolution impacted the lives of so many people, often not in a good way, and of course during the first half of the war with France.  Even out of office his policy of prosecuting the war with France by subsidising continental allies was continued by his successors.

Like many other great public figures,  Pitt was a very clever and complex man with significant personality flaws who possessed the ability to induce hatred among his enemies and adulation in his supporters. He lived for politics only and one can only wonder what he may have achieved if he had taken more care of his health.

Well researched and well written, if somewhat heavy at times, this is a good book on an extraordinary person. If you are interested in the man, the politics of the time or the political response to the French Revolution and the early years of the war , this is the book for you.


Saturday, 23 October 2021

WOODWORKING PROJECT. PART 6.

 This is the final part of this series of posts. Following completion of the construction process, the next task was to cut the 85 shelves. These are made from the same quarter inch (6mm) melamine faced MDF as the back panel. Each shelf is about 12 by 6 inch (300mm by 150mm). Once cut the leading edge is faced with a strip of black insulating tape to hide the "raw" edge. I have investigated the use of solid plastic edging but the cost is quite prohibitive so £1 for a single roll of tape is a bargain and also easily replaceable if damaged at any time. That said it is also a very time consuming and fiddly task.


Having made the shelves the next step was to manhandle the unit upstairs and install it underneath the existing unit which had been propped up on a couple of temporary legs since the bookcase that originally supported it had been removed. This task called for reinforcements and my youngest daughter Laraine was drafted together with my wife. My all female task force performed very well and while they held the original unit, I removed the temporary legs and put the new unit in place. The old unit was gently lowered about half an inch, lined up and the two units screwed together.


I then attached the units to the wall at the top with rubber connectors. This will allow the units to sink into the carpet over the next few months without pulling the fixings out of the wall. After say Christmas I will remove those temporary fixings and put in something more substantial. The shelves were then wiped clean and installed as seen above.


To help with the settlement issue, and to provide a better storage solution, I then loaded the shelves with boxes of unpainted screws. These will of course be removed, treated and painted over time as the new army is constructed. The final element was the new doors which were delivered yesterday and installed.


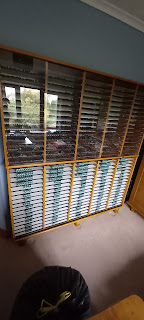
The photo above shows the whole unit. Once I have finished upgrading the existing armies, maybe in the new year, I will commence construction of my new 4th army which should take me 5 or 6 years at least to complete. I hope this series of articles has been of interest.


Tuesday, 19 October 2021

UPDATE.

 Some readers will recall in my last update I lamented the demise of my trusty tin of very old silver paint. Following that post my wife flippantly suggested I put some nail varnish cleaner into the paint. Well thought I, that's an idea. The active ingredient of nail varnish cleaner being acetone it might work and I have nothing to lose. I have some pure acetone in the workshop so I tipped away most of the "thinners" liquid in the top of the tin and replaced it with an equal amount of acetone. Hey presto, the paint mixed up perfectly. Now a week later, I have reopened the tin, mixed it easily and used it very successfully. The only slight issue is that it dries even quicker than before but that is not a problem as I only paint very small areas mainly rank insignia.


So my very old tin of paint has come back from the dead. Now another thought occurs to me. I use Humbrol paints and a long term issue with some of the gloss paints especially red, is that after a short time they turn to jelly. No amount of thinners seems to solve the problem so that tin gets thrown out and another is purchased. I have seen this problem raised by other modelers too. I now wonder if acetone would work. I will try it and report back just as soon as another tin goes to jelly. Pure acetone can be purchased in chemist shops although many do not carry it, if you want some just shop around.

On the modelling front, once again I have made only limited progress over the past couple of weeks due to social commitments and working on my new modelling unit. However the final upgrade batch of mounted troops now only requires the horses to be painted to be complete.  In addition upgrade number 38 has been finished this morning and I am working on upgrade 39 this afternoon.

On another matter I have been engaged  recently in a substantial correspondence with Ion of the Archduke Piccolo blog. Ion has decided to wargame a campaign based on scenarios in my Imagi-Nations Part 44 post. I am delighted he has decided to do this and have been providing background information and offering insights into the strategic thinking of the combatants. The first battle has been fought and I have seen the initial battle report. Ion plans to publish the reports on his excellent blog in the coming days and weeks. I strongly recommend reading his reports which are always very exciting.


Friday, 15 October 2021

BOOK REVIEW: MARKED FOR DEATH.

THE FIRST WAR IN THE AIR.


 Trawling through my library for a new book to read I came across this book. I must admit I have no recollection of ever reading it or even when I may have bought it, in fact it was a totally new book to me !!!!! Clearly old age must be creeping up on me and impacting my memory at the very least....now where was I .....oh yes.

This book discusses the air war from 1914 to 1918 in a very interesting way. It does not go into much detail about planes, pilots or battles etc but in a loose chronological way covers  major topics like "why biplanes", "making the flying man", "how they lived", "parachutes and fatalism", and of course many other matters. This means the book is very readable, exciting and interesting more like a novel than a history book. 

The simple message that comes across clearly is that early aviators, especially those in the various military's, were true pioneers and generally lived short lives and met violent unpleasant deaths. The wonder for us is that there were so many of them willing to take unbelievable risks just to advance knowledge of flying and serve their countries at the same time. The author reminds us that it is impossible today to fully understand the attitudes of 100 years ago  just as much as they would not understand much of our beliefs today.

Overall an excellent book and very well written on a fascinating subject, but still a puzzle why I have not read this before now !!!!!!

Monday, 11 October 2021

WOODWORKING PROJECT. PART 5.


The next task was to apply stain to the unit and then two coats of lacquer with a very light sanding between coats. The result is shown below.


 Having completed the woodworking aspects of the build I next turned to fitting out. The first task was to install the 170 shelf supports.  This material comes in 2 metre lengths and had to be cut up in 170 equal lengths on the mitre saw. Each piece then required two holes for screws. The pile of supports is shown below.


The task of fitting these supports is laborious. It actually took about six hours. As I am right handed it is only practical to do the right hand side of each upright, unless you have universal joints in the elbows or can grow a third hand of course. Therefore once all the right side supports are done, the whole unit had to be turned around  and the rest fitted through the open back. I learned the hard way not to fit the back panel first !!!!


The method of fitting the supports involves using a spacer that I made for a previous unit, its much easier than measuring for each and every support. The spacer is clamped in position, the support offered up and pilot holes drilled into the wood. Two screws are then installed. I use half inch roundhead screws which are not readily available. The standard size is three eighths but I find these are just a bit too long. Sometimes the screws meet with those installed on the other side of the timber. The half inch screws only overlap by three millimetres so just push past each other. The longer three eighths screws overlap by over  six millimetres and can be hard to drive in satisfactorily. The spacer can be seen in the photo below.


Finally all 170 shelf supports were fitted and the back panel was cut to size and pinned into the groove around the back edges of the unit. It is also pinned to the backs of the central uprights. The very last job was to cut and glue in the door tracks and the unit was finished as seen below.


The next and last post will cover actual installation of the new unit and making of the shelves themselves.


Thursday, 7 October 2021

UPDATE.

 Over the past couple of weeks most of my free time has been spent on the woodworking project about which I will do another update over the next few days. On the modelling front I have only managed to complete one more upgrade, number 37, which means the armies have reached 58,239 strong.

The final mounted upgrade has progressed a bit in that the soldiers have been mounted on their horses and painted. The next task is to under coat and top coat the horses as seen below.

When I first started modelling back in the early sixties, limited pocket money meant I used any paint I could lay hands on. This included a pot of heat proof silver paint I found under the kitchen sink. In fact I have continued to use that silver paint right up to the present day !!!! Yes that paint has lasted almost 60 years !!!!! and it is still only half empty. I have noticed however over the past month or so that the paint was settling out very quickly during use and becoming harder and harder to stir back to life. I regret to say I think this old faithful has now finally reached the end of its life.


I have sourced a new pot of Humbrol silver paint and have retired this old pot. However, being a bit sentimental , I cannot quite bring myself to part with that old pot of paint, at least not yet. I have put it into the back of the cupboard for the time being. I think it remarkable that a pot of paint could last quite so long, it has given very good service for so many years.